
Hello Friends!, today we are going to learn a step-by-step process to create Spring Boot application using Spring Initializr.
you can check how to create a Spring Boot Application with Eclipse and Maven, in this post we will learn how to create Spring Boot application from the maven project and that is manual process.
This is a simple process to create a Spring Boot application. we will use Spring Initializr tool to bootstrap our application using Spring MVC.
Create Project on Spring Initializr
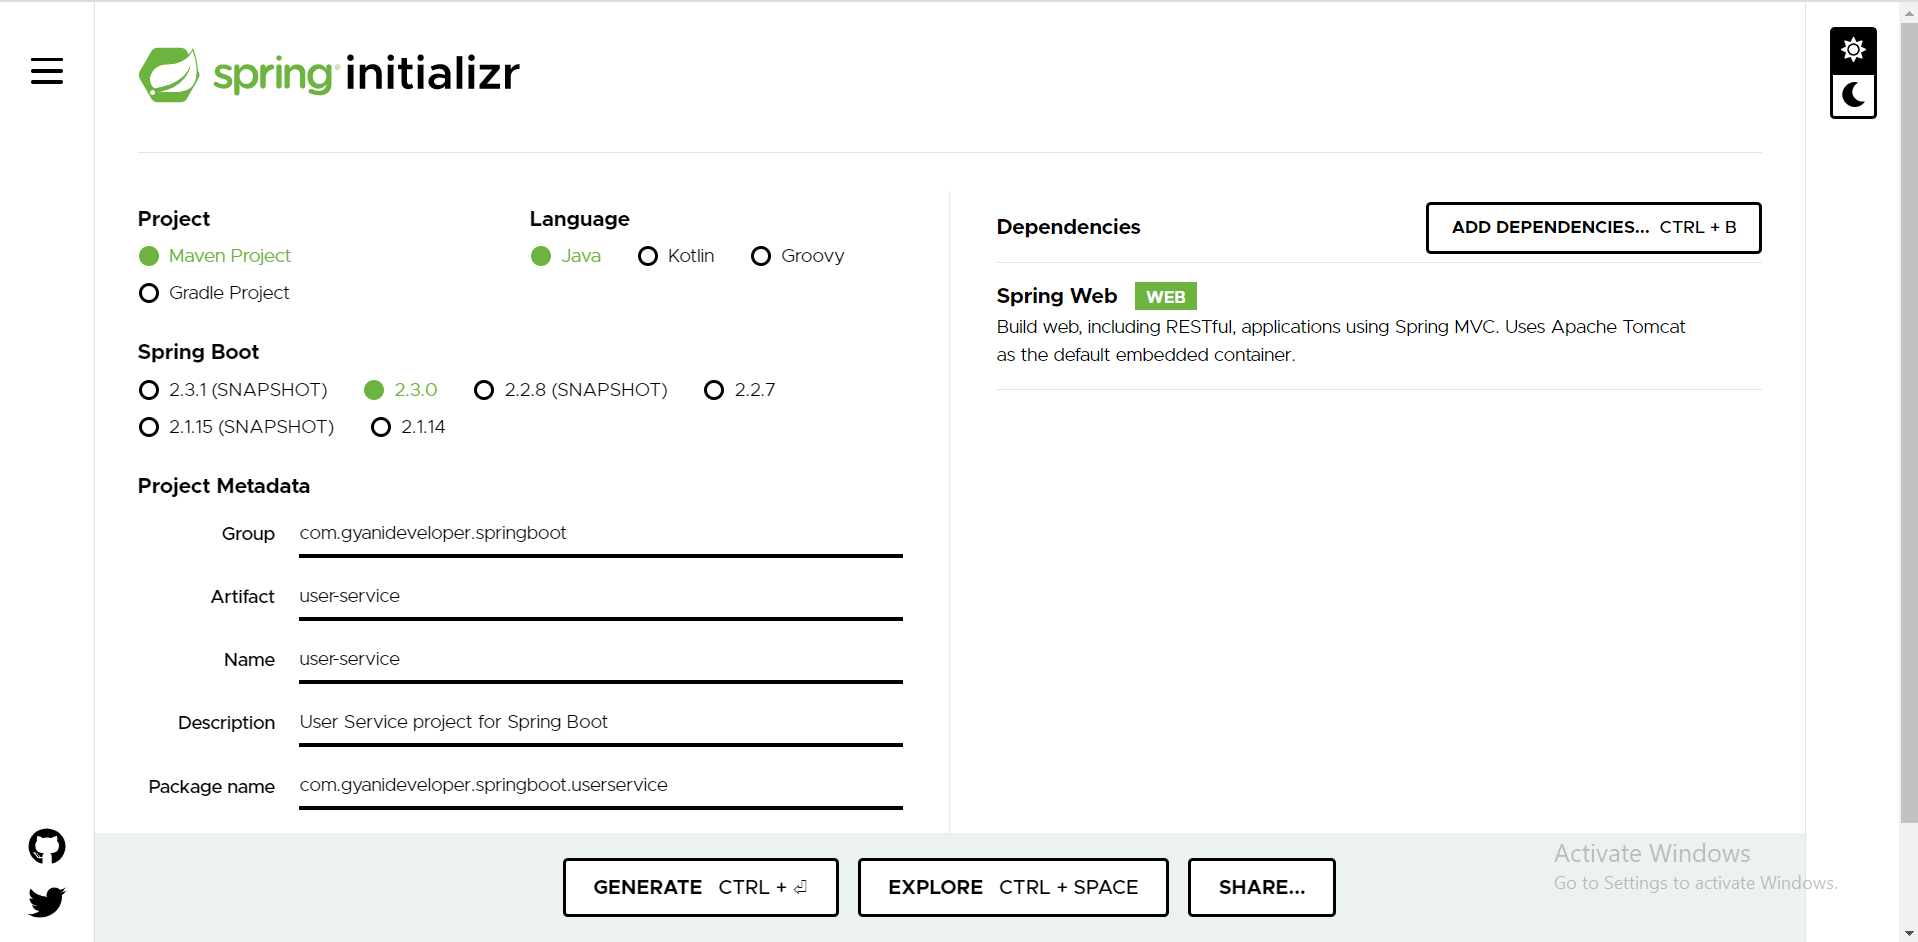
Set Project metadata as show in image.
- Group :
com.gyanideveloper.springboot - Artifact :
user-service - Name :
user-service
click on ADD DEPENDENCIES button or press CTRL + B on keyboard.search and add Spring Web starter dependency as show in image.
we can add multiple
dependenciesas we required in our application. we can click on EXPLORE button or press CTRL + SPACE on the keyboard to check the application structure
click on GENERATE button or press CTRL+ ENTER on the keyboard, This would download a ZIP file to your local machine. Unzip the zip file and extract it to a folder.
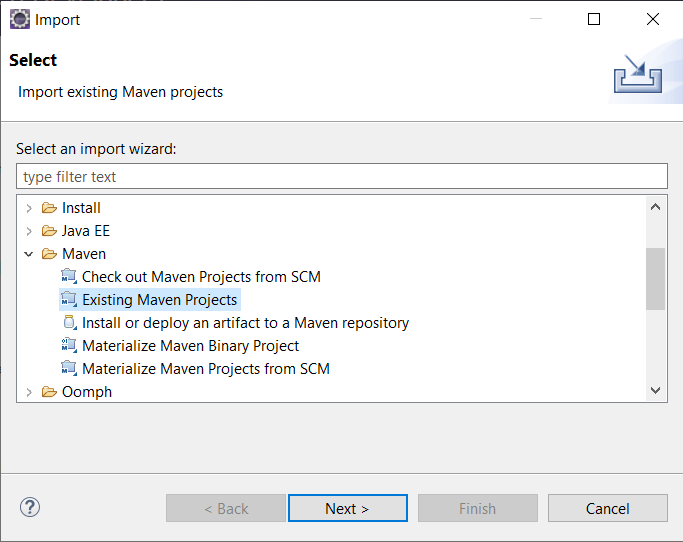
Import Spring Boot Application in Eclipse.
Click File -> import select Existing Maven Projects as shown below and click on Next Button.
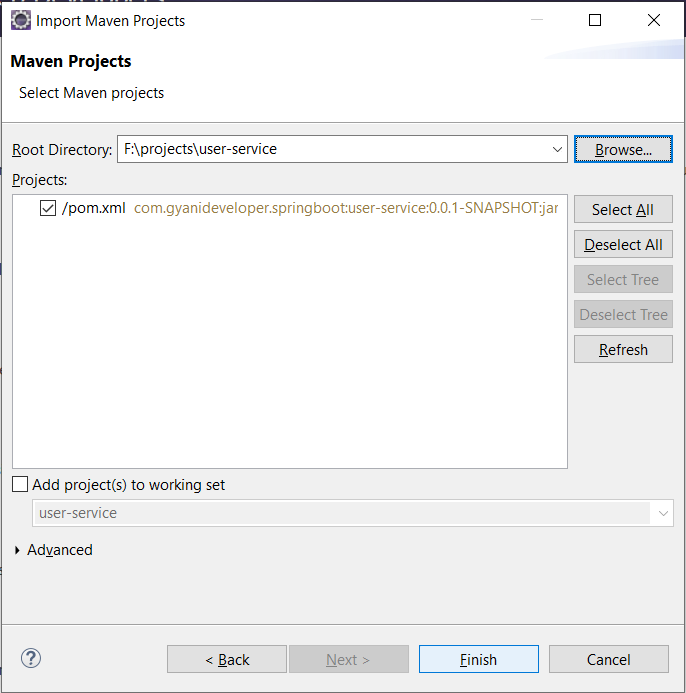
Click on Browse button and navigate to the path where you extracted the ZIP file and select that folder as shown below and click on Finish button.
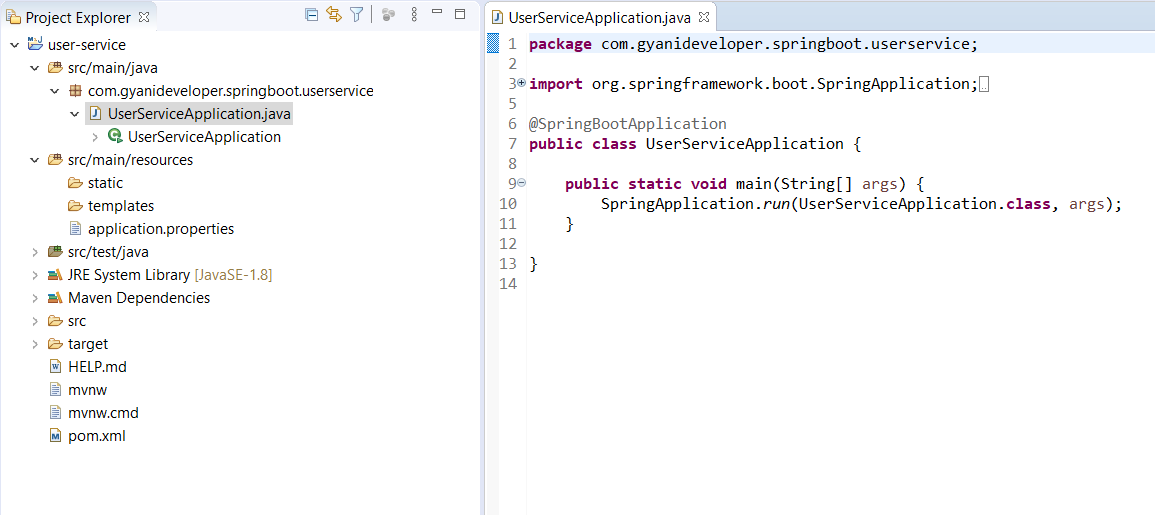
Your project will get open in Eclipse and it takes some time to initialize and Maven to download the dependencies.
our project structure look like below.
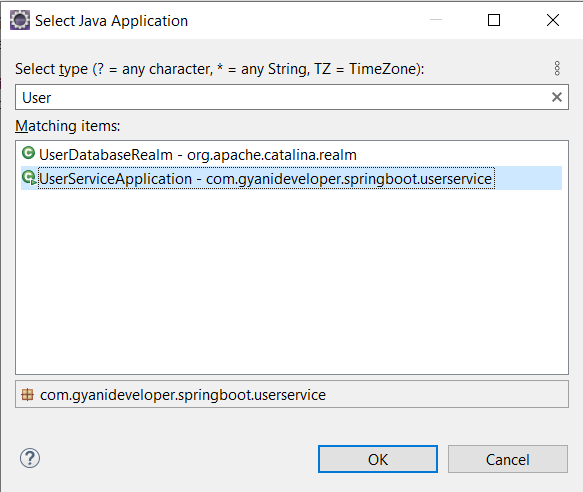
Right-click on project -> run as -> java application. Search and select the main class as shown below and click on OK.
It start your Spring Boot application on port number 8080 , we can find console log as below.
If the application fails to start because the port is in use. please check our How to Change the Default Port in Spring Boot post for more details.
  .   ____          _            __ _ _
 /\\ / ___'_ __ _ _(_)_ __  __ _ \ \ \ \
( ( )\___ | '_ | '_| | '_ \/ _` | \ \ \ \
 \\/  ___)| |_)| | | | | || (_| |  ) ) ) )
  '  |____| .__|_| |_|_| |_\__, | / / / /
 =========|_|==============|___/=/_/_/_/
 :: Spring Boot ::        (v2.3.0.RELEASE)

2020-05-22 01:25:53.462  INFO 3040 --- [           main] c.g.s.u.UserServiceApplication           : Starting UserServiceApplication on DESKTOP-XYZABC with PID 3040 (F:\projects\user-service\target\classes started by Gyani in F:\projects\user-service)
2020-05-22 01:25:53.466  INFO 3040 --- [           main] c.g.s.u.UserServiceApplication           : No active profile set, falling back to default profiles: default
2020-05-22 01:25:55.129  INFO 3040 --- [           main] o.s.b.w.embedded.tomcat.TomcatWebServer  : Tomcat initialized with port(s): 8080 (http)
2020-05-22 01:25:55.145  INFO 3040 --- [           main] o.apache.catalina.core.StandardService   : Starting service [Tomcat]
2020-05-22 01:25:55.145  INFO 3040 --- [           main] org.apache.catalina.core.StandardEngine  : Starting Servlet engine: [Apache Tomcat/9.0.35]
2020-05-22 01:25:55.248  INFO 3040 --- [           main] o.a.c.c.C.[Tomcat].[localhost].[/]       : Initializing Spring embedded WebApplicationContext
2020-05-22 01:25:55.248  INFO 3040 --- [           main] o.s.web.context.ContextLoader            : Root WebApplicationContext: initialization completed in 1694 ms
2020-05-22 01:25:55.467  INFO 3040 --- [           main] o.s.s.concurrent.ThreadPoolTaskExecutor  : Initializing ExecutorService 'applicationTaskExecutor'
2020-05-22 01:25:55.717  INFO 3040 --- [           main] o.s.b.w.embedded.tomcat.TomcatWebServer  : Tomcat started on port(s): 8080 (http) with context path ''
2020-05-22 01:25:55.739  INFO 3040 --- [           main] c.g.s.u.UserServiceApplication           : Started UserServiceApplication in 2.743 seconds (JVM running for 3.256)
Your first application is ready.
Final Note
we have learn how to create spring boot application by using Spring Initializr.